Now that I’ve got a little more time on my hands, I decided to bring out the good ol’ Philips Airfryer and attempt to make some easy breakfast. This is of course, after I was being inspired by the many tempting pictures of other people’s Air-Fried breakfast. There was one in particular that struck me:
Doesn’t it look so simple, tasty, and tempting!
Well unfortunately, I couldn’t find a proper recipe online, so I decided to roll up my sleeves and do it my way.
Before I go on to the ingredients and recipe, I have a confession. I tried making this twice but failed. Why?
Firstly, I placed only 1 slice of bread inside the ramekin which was barely enough surface area to contain the egg (let alone the ham, cheese, and other condiments). So I added another slice of bread, but flattened both of them before lining the inside of the ramekin. This way, the 2 slices of bread don’t get too “thick” and the crevice is big enough for me to add more ingredients. With 2 slices of bread (one stacked above the other), the toast cup also becomes slightly higher than the ramekin, preventing the raw egg from spilling over.
Secondly, I lined the ramekin with the 2 slices of flattened toast (one on top of the other) without applying butter on the insides of the ramekin. As a result? The toast became stuck to the ramekin and trust me, it was a total washing nightmare.
Air-Fried Ham & Egg Toast Cups
Ingredients:
- 4 Ramekins (I bought mine from Daiso at $2 each!)
- 4 Eggs
- 8 Slices of Toast (Preferably wholemeal for a more wholesome breakfast)
- 2 Slices of Ham (I used Chicken Ham, but you can use whichever you prefer)
- Butter
- Salt
- Pepper
- Cheese (Optional)
1. Firstly, brush the interior of the ramekin with a generous amount of butter with a cooking brush. Seriously. The more butter, the easier it is to remove the toast cups from the ramekins.
2. Flatten 8 slices of toast with either a rolling pin or your own palm. Make it as flat as possible
3. Line the inside of each ramekin with a slice of flattened toast. I know it’s a bit odd to squeeze a square into a circle and there’s surely bound to be excess bread folding inwards. But try to pinch the extra folds and make it as nice a cup as possible.
4. Place another slice of flattened toast on top of the first toast and likewise, try to flatten the extra folds.
5. Cut 2 slices of ham into 8 smaller strips.
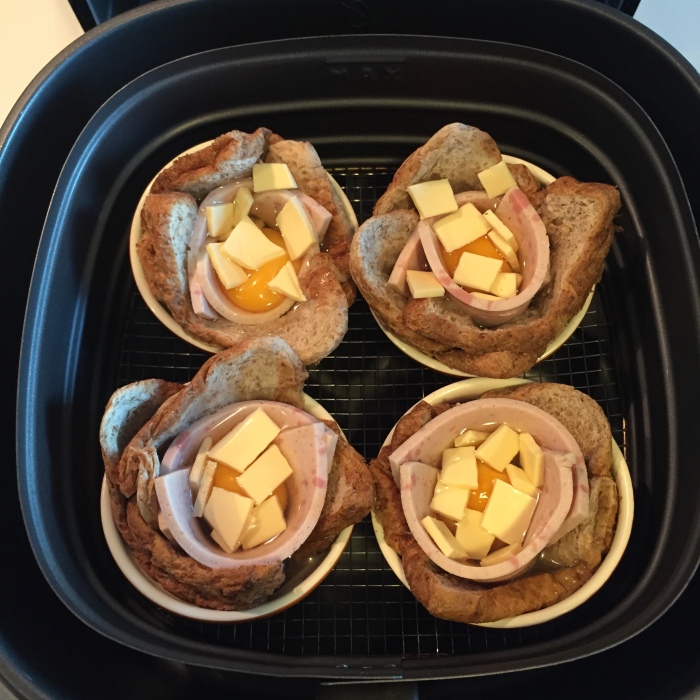
6. Line 2 strips of ham in each ramekin. See picture above for reference
7. Crack an egg into each toast cup
8. Add a pinch of salt and some ground black pepper into each egg
9. You may also add some cheese into the toast cup (as seen above). Personally, I used 1 slice of cheddar cheese and cut into small pieces.
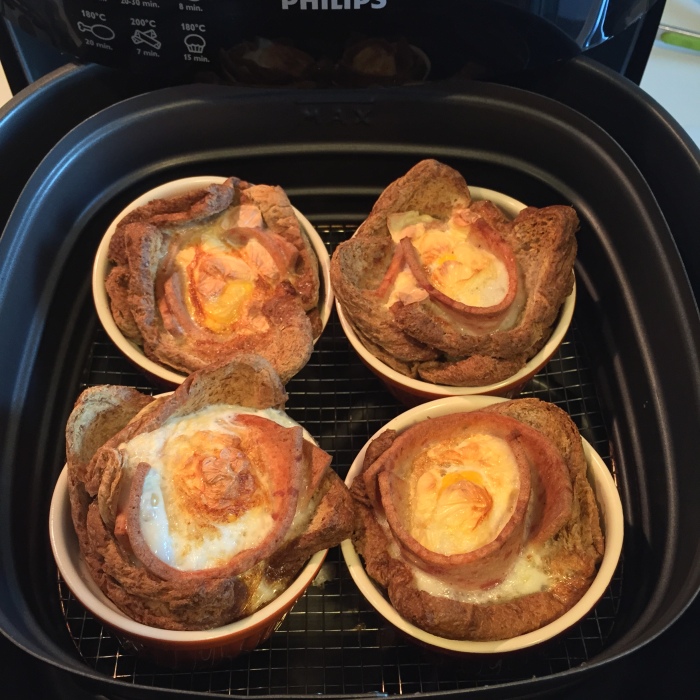
10. Place all 4 ramekins into the Airfryer for 15 mins at 160 degrees. You do not need to preheat the Airfryer in advance
11. Once done, remove the ramekins from the Airfryer with either a tea towel, silicone tongs or whatever kitchen contraception you have that protects your fingers from the heat.
12. To remove the toast cup from the ramekins, I used a small knife and slowly sliced it round the inside of the ramekin just in case some bread got stuck to the sides. Then I wriggled the toast cup out of the ramekin with the same small knife and a spoon.
Don’t they look absolutely gorgeous! It’s a simple, easy. and healthy breakfast fix or a party snack!
If you prefer your eggs to be more cooked, you can increase the time from 15 mins to perhaps 18 mins. I like my eggs a bit more runny, so I air-fried it for only 14 mins at 160 degrees.
Well I hope you like this recipe as much as I do, because not only does it look good, it taste damn bloody good too. Bon Appetite!


